Grohe faucets are amazingly sleek and will make your bathroom look lavish; that’s no secret. But when it’s about DIY plumbing, these water taps can be a nightmare!
As their construction is trickier than the traditional faucets, some of you will feel totally lost while dismantling or installing them. However, this task may be a bit daunting, but it isn’t impossible.
So the ultimate question is, how to take apart a Grohe bathroom faucet without making any fuss?” Well, that’s what we’ll discuss here today.
We are about to give you a step by step instructions on detaching and reinstalling this innovative fixture. If you want to find out more, just keep reading!
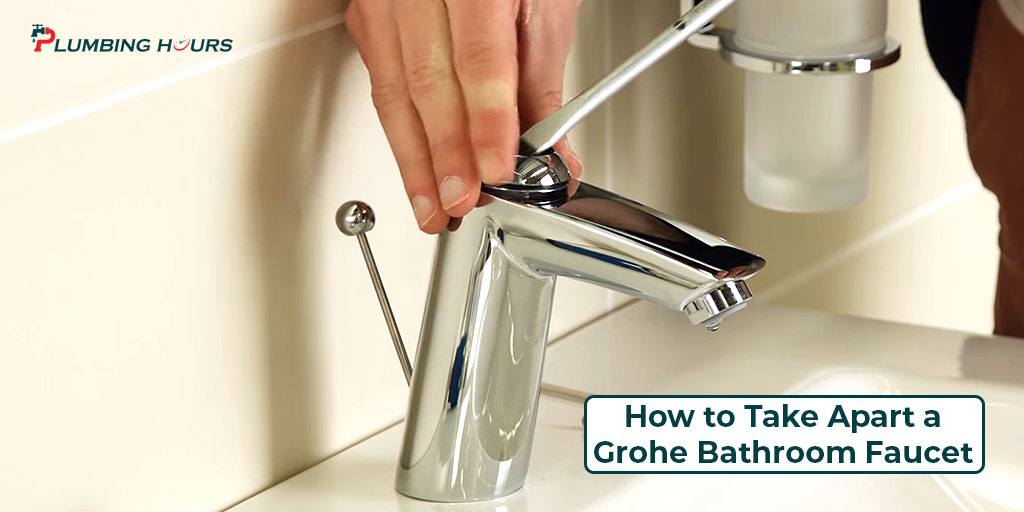
How to Take Apart a Grohe Bathroom Faucet – Where Do You Start?
Like the typical bathroom faucets, the Grohe ones are also attached with screws. But the exception is, the attachments are hidden under the cap or lever to make the structure look classy. And this is one of the primary reasons behind the Grohe bathroom faucet installation being so complicated!
But the truth is, you can easily complete this whole procedure in 15-20 minutes if you have the right instructions. And that’s why we have come up with this simple and detailed guideline for you.
However, before we start giving you Grohe bathroom faucet repair instructions, you need to take some precautionary steps. So let’s check out that part first.
Precautionary Steps to Take before Taking Apart a Grohe Faucet
Here are some preventive measures you need to take before you start detaching the faucet. These are some easy steps and whether you are setting up or detaching the tap.
Turn Off the Water Supply
Unless you want your Grohe bathroom faucet leaking all over the place while dismantling, you must shut off the water supply. All you have to do is find out the two valves under the sink that regulates cold and hot water stream. After that, turn them off by twisting clockwise, and you are done!
If you somehow fail to shut the valve or can’t find them, just switch off the house’s main water supply, and you will be good to go.
Protect the Sink Drain
When you are done with turning the valve, you have to cover the drainage system of your sink. Take a piece of towel or any cloth and put it over the drain. It will prevent the screws from getting lost.
Taking Apart the Bathroom Faucet – Step By Step Instruction
The process of dismantling the faucet can be divided into two phases.
- Phase One – Removing the handle
- Phase Two – Removing the previously installed cartridge and put in a new one.
To take apart the tap, we have to start with the Grohe faucet handle removal. Then you’ll have to go for the cartridge elimination. So let’s get you introduced to the procedure.
Things You Will Need
- An Allen Wrench
- An adjustable wrench
- A flathead Screw Driver
- Replacement cartridge (If needed)
Phase One: How to Remove Grohe Faucet Handle
Here is the Grohe bathroom faucet handle removal instruction for you. It seems a bit complicated at first, but we’ve made the steps super easy for you to understand.
Step One: Locate the Al len Key
First of all, turn on the tap to get rid of the remaining water and air on the tube. When it is empty, take your flathead screwdriver, and then go to the faucet’s side to spot the small plastic bolt which keeps the Allen screws covered.
Step Two: Loosen the Handle
Now take your Allen wrench and remove the Allen screws by rotating the tool counterclockwise. After doing it 4 to 6 times, the handles grip will be loosened, and you can easily remove it.
Step Three: Remove the Handle
Once the handle is loose, gently pull it upward to detach it from the fixture. When you do so, you will see the cartridge in front of you.
Phase Two: Cartridge Replacement and Reinstallation
You might be thinking that it is the Grohe faucet cartridge removal time for you. But wait, you still have a nut between you and the cartridge that you need to eliminate first.
Step One: Remove the Nu
Take an adjustable wrench to grab the nut. Then use a little pressure and rotate the tool counterclockwise. After a while, the nut will get loose, and you can remove it effortlessly.
Step Two: Take Out the Cartridge
Finally, here is the Grohe cartridge replacement instruction for you. There is nothing much to do after getting rid of the nut. Just grab the cartridge with a wrench, and it will be out soon.
When you are done removing this component, check the sink for buildups debris. This is the best time to clean your sink to enjoy the fiercest water pressure! Moreover, the most amazing thing is, you can
Final Step: Reinstall the Cartridge
Now it is time for you to install the cartridge again. However, you can use a brand new component or the old one. If you are planning to install the old cartridge again, you need to clean it properly.
First, pop the cartridge into the sink to line up the two tabs to complete this step. In this way, you can determine its correct position. Once the cartridge is placed properly in the holder, take your wrench, place the nut and fasten it in a clockwise motion.
And voila! You are done with the whole process! However, if you are thinking about how to take apart a Grohe kitchen faucet, you can use the same procedure.
Difference Between Taking Apart a Single-Handle and Double-Handle Grohe Faucet
There are no significant differences between the removal procedures of two different types of faucets. All you have to do is remove two handles and two cartridges separately while detaching your double-handle spigot.
And when you are dismantling a single-handle Grohe aerator, you have to go through the procedure only once.
More Tips You Might Love To Know
How to Connect Two Faucet Supply Lines Together?
How to Hook Up a Portable Dishwasher to a Pull Out Faucet?
10 Best Faucet for Pedestal Sink
How to Install a Grohe Bathroom Faucet – A Detailed Instruction
For any DIY plumber out there, the Grohe bathroom faucet installation is a complicated job. But if you keep doing it, the process will become easier. And here is our simple step by step installation process for you that will give you a sigh of relief!
Step One: Attach the Mixer to the Seal
First of all, you have to place the pipes with the sink mixer opening. And then, make sure that the waterproof sealant of the mixer is attached to the sink. After that, connect the mixer and the seal securely.
Step Two : Tighten the Lock with the Rod
Now take your tightening nut, place it through the threaded shaft facing towards the watertight sealant. Then fasten the lock with the rod as tightly as possible.
Step Three: Seal the Plug Hole
When you are done with tensioning the lock, you have to shut the bunghole with a waterproof module and pop in the bunghole into the drain opening. After doing that, attach the threaded piece of the bunghole with the sink.
Step Four: Unite the Parallel and Pop-up Rod
It is time for you to place the bunghole shaft into the sink mixer. For this purpose, you can utilize a connector to link the parallel shaft with the bunghole one.
Step Five: Remove the Extended Part
Take a metal and use that to take out the extended piece of the bunghole and locking shaft.
And you need to ensure that the sealant of the plug-hose is done correctly. If you have some doubts, apply another waterproof cover to tie up the seal of the plug-hose. Then you are done with setting up your spigot!
Yes, we know that this Grohe bathroom faucet installation manual guideline wasn’t as straightforward as you thought it would be. It feels problematic at first, but once you complete the process by yourself, the next session will be smooth like butter!
Frequently Asked Questions (FAQ)
1. How Do I Keep the Grohe Faucet Aerator Clean?
Cleaning the aerator of the Grohe water tap is super easy. It can be using a little bit of soap and a damp washcloth. Just wipe the aerator with a soapy cloth and then rinse it well with hot water.
And if you want to prevent spots and buildups, dry the component after every use. In this way, you can avoid lime deposits pretty effortlessly.
By the way, if you are struggling with removing the faucet aerator, no worry we have another content about how to remove a faucet aerator without a wrench.
2. How to Replace the Grohe Faucet Aerator?
Here is the Grohe bathroom faucet aerator replacement instruction for you.
- First of all, get a towel or piece of cloth and cover the sink drain. You can also use any plastic cover if you want.
- Now extract the aerator parts using channel lock pliers. Yes, you don’t need any specific Grohe aerator removal tool for this part. But you have to wrap the faucet opening around the limiter to protect the finish from scratches.
- Place the aerator components on your countertop in the correct order so you can place them without any hassle. If you are getting a new aerator, you don’t need to do that.
- To clean the spigot, turn it all and run both hot and cold water one by one for 20-30 seconds.
- After cleaning the housing, place the new aerator or the old one and tighten it using the pliers. You can also use the tap without this limiter, but it will protect you from splashes, which is necessary!
3. How Many Types of Grohe Cartridges are There?
There are typically two types of cartridges you’ll see.
- Single –handle
- Double-handle
The single-handle mechanism uses only one cartridge for both hot and cold water. And the double-handle one will utilize different cartridges for each type of water temperature.
4. How to Fix a Low Water Pressure in Grohe Kitchen Faucet?
Here is a quick Grohe kitchen faucets repair tip for you.
- Firstly, remove the aerator with channel pliers. Don’t forget to wrap the spigot with tapes.
- After that, inspect the aerator for any debris or buildup. If there is any, clean it gently with soap and hot water and let it dry.
- Now run the water stream without the aerator for a few seconds and put it back again.
So repairing the Grohe kitchen faucet’s water pressure was pretty simple, wasn’t it?
The Bottom Line
The beauty of learning how to take apart a Grohe bathroom faucet is an incredible thing as you can use this method for everything else. Using the same procedure, you can perform Grohe kitchen faucet removal by yourself!
So yes, this ultimate guide will help you to accomplish many tasks at once. Therefore, while enjoying trouble-free plumbing, don’t forget to thank us!
I must thank you for the efforts youve put in penning this site. I am hoping to check out the same high-grade blog posts by you in the future as well. In fact, your creative writing abilities has motivated me to get my very own blog now 😉
Hey! I just wanted to ask if you ever have any trouble with hackers? My last blog (wordpress) was hacked and I ended up losing a few months of hard work due to no data backup. Do you have any methods to stop hackers?
This is my earliest time i afflict here. I base so tons absorbing baggage inside your blog particularly its discussion. From the tons of comments on your articles, I judge Im not the just one having all of the gratification here! keep up the nice work.
This really answered my problem, thanks!