Plumbing problems are the most unwanted hassles in our everyday life. But believe me, their solutions are not as complex as they are. The perfect example is a Moen kitchen faucet loose at base. Unfortunately, they can disrupt your daily clean-ups. But with some DIY stuff, you can bid it goodbye.
Do not settle with the situation and overlook the problem because it will start damaging the pipelines over time without you noticing. But you don’t want to bother calling a plumber each time there is a minor problem, right? That’s great. What if you learn how to tighten a loose Moen kitchen faucet base instead?
Yes, that is what this article will do – it will ensure you know how to tighten kitchen faucets the next time they give you trouble.
What Makes a Moen Kitchen Faucet Loose?
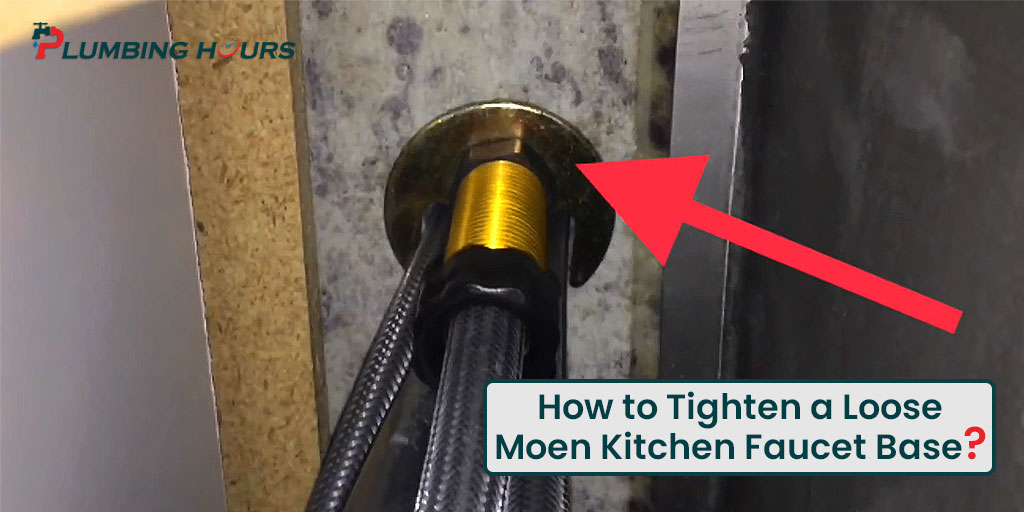
A loose nut that keeps the faucet head and base together results in a loose Moen kitchen faucet. You will find it on the mount’s underside. Over time, the threads of the nut get damaged, causing it to become loose.
In another case, it might become loose if it slides. For example, if a plumber overtightens it to the extent that the nut slips on its bolt, it will lose grip. That will also loosen a kitchen faucet.
What Is the Symptom That My Faucet Base Is Loose?
Every faucet’s base and handle become loose due to frequent usage over time. It is entirely normal, so you do not have to worry about it. Moen faucets are specifically built to last a long time. Hence, you do not need to be concerned with the issue at first.
But when you see water leakage, consider it a sign to fix the handle or base. One of the most common symptoms is that the nut connections are not tight anymore, enabling water to leak.
The leaking will get worse when the problem does. So, the best option for you at that time is to tighten up the handle or base quickly. The leakage will not cause a catastrophe, but it can be a significant annoyance. And you do not want to delay handling it.
What Are the Tools Used for Tightening a Moen Kitchen Faucet?
You will need a bunch of tools to tighten a loose kitchen faucet base. But worry not, they are not expensive. Besides, they have various uses. You will need them for other plumbing works.
The tools are as follows:
- Flashlight
- Pair of hand gloves
- Mini knife
- Basin wrench
- Adjustable wrench
- And a 3/32 inch Allen wrench
You should have them at ready before getting to work. Otherwise, when you don’t find a tool in the middle of the process, it may drive you crazy and prolong the job.
How to Tighten a Loose Moen Kitchen Faucet Base in Easy Steps
There are only six simple steps you need to learn how to fix a loose kitchen faucet base. Pay heed while you are reading so you don’t mess up when the time comes!
Step 1: Plugging up the Basin Drain
First, you should plug up the basin drain to confirm that no small parts or nuts of your faucet can get their way out of it.
It is essential because when you lose a nut or piece by any chance, you will have to stop everything and dash to the market to buy it. Indeed, that is not something you would look forward to in a situation like this. So, always remember to close the drain hole using its cover.
Step 2: Locating and Turning off the Water Supply Valves
In this step, you need to find your faucet’s water supply valves. There are generally two kinds of them if you have a Moen kitchen faucet. One is for cold water and the other, hot water.
You will see them at the faucet’s back. If there is no proper lighting, you may not reach the valves. If that is the case, use your flashlight.
After you get the water supply valves of the faucet, shut off both valves by rotating a few times in an anticlockwise direction.
When you reach them, shut both of them off. To do so, rotate the valves anticlockwise for a brief while.
Here is what you must not forget: seal the valves off appropriately. Otherwise, you may find water dripping on your body while fixing the faucet. That will be a disturbance, distracting you from doing the job right.
So, when you turn the valves, turn the faucet handle again to ensure that you have closed the water supply accurately.
Step 3: Turning on the Valves for Releasing Pressure
Now that you have turned off the valves, you need to open the faucet handle. It is so that the handle can release pressure in the supply lines.
It is a crucial part of the process because it assists you in proceeding with the next steps. So, do not think of skipping this one. That would only delay the fixing.
Step 4: Taking the Water Supply Lines out
Retake the flashlight to concentrate on the area around the Moen kitchen faucet base. Now grab your adjustable wrench and take your water supply lines out.
Get the wrench attached between the water lines and the inlet. Then turn it to take them out anticlockwise. Remember to put the hand gloves on while you are at it. It will keep your hands unharmed.
Step 5: Tightening the Loose Faucet Base Nuts
You are nearly at the end. Now you need the basin wrench to clasp the loose nuts linking the Moen kitchen faucet up with the base. You will find a basin wrench available in any plumbing store in your area.
After gripping the nuts with your basin wrench, start applying pressure to tighten them. Always be sure to pull the loos nuts sufficiently. If not, you will have to redo the whole thing pretty soon.
Step 6: Checking the Tightness of the Faucet with Its Base
When you finish tightening the nuts, connect the valves and open the Moen kitchen faucet handle. Now observe for any water leakage from the faucet base.
If there is none, congrats! You did it! Go refresh yourself with something and celebrate the victory!
How to Tighten a Loose Moen Kitchen Faucet Handle?
What if you find water leakage from the Moen Faucet, but the base is not responsible for that? Where do you look now? The handle. Sometimes a loose Moen kitchen faucet handle is the main culprit. But don’t sweat yourself. The steps below will tell you how to tighten a faucet handle.
First, turn the water off. Next, wipe the sink area clean and close the water lines. This part of the process is the same as the previous one. So it should not be more complex for you.
Now, check the faucet handle and look for the faulty mechanism. That is when the faucet’s style enters the scene.
Take the hex screw out. Looking into the faucet handle, you will notice a hex nut bolted inside. Get it out by using the mini-knife. Stay cautious because the nuts are plastic-made. That should not take more than two minutes.
If you do not find the set screw on the inside, check the cap. The nut might be under it. Use the Allen wrench to get it out. After getting it out, sit and relax. You have accomplished the most challenging part of the process.
Now tighten it by using the wrench clockwise. While making sure you got it there perfectly, do not overtighten. The rest of the drill is the same again. Again, reconnect the supply lines, valves, and test them for water leakage.
A Piece of Friendly Advice
The solutions to how to fix a loose faucet are the best DIY ways to solve the issues. However, you should also know that it is not always best to apply this method in all cases. For example, if your faucet occasionally leaks a little water, you may leave it for several months and wait.
Sometimes trying to tighten it may result in irreparable damage. Then you will not have any option left other than buying a new kitchen faucet. Also, if you are not comfortable following the mentioned steps, it will be better to ask the help of a professional.
You Can Also Have Look on :
How to Remove a Faucet Aerator Without a Wrench?
Best Faucet for Pedestal Sink
Final Words
Kitchen faucets from Moen are the most durable and widely used faucets. But the problem with them is that the base gets loose at times and causes water leakage. However, it is a more common plumbing issue than you could guess. So, it is better to learn how to tighten a loose Moen kitchen faucet base than depend on your plumber to do it for you.
You only need to have the necessary tools ready and follow all the steps serially. Then, once you get a hold of it, it will become a piece of cake for you.
Hopefully, the article has helped you. Best wishes with fixing your loose Moen kitchen faucet!
I do agree with all of the concepts you’ve offered to your post. They are really convincing and will definitely work. Still, the posts are very brief for newbies. May just you please prolong them a little from next time? Thank you for the post.
I must thank you for the efforts youve put in penning this site. I am hoping to check out the same high-grade blog posts by you in the future as well. In fact, your creative writing abilities has motivated me to get my very own blog now 😉