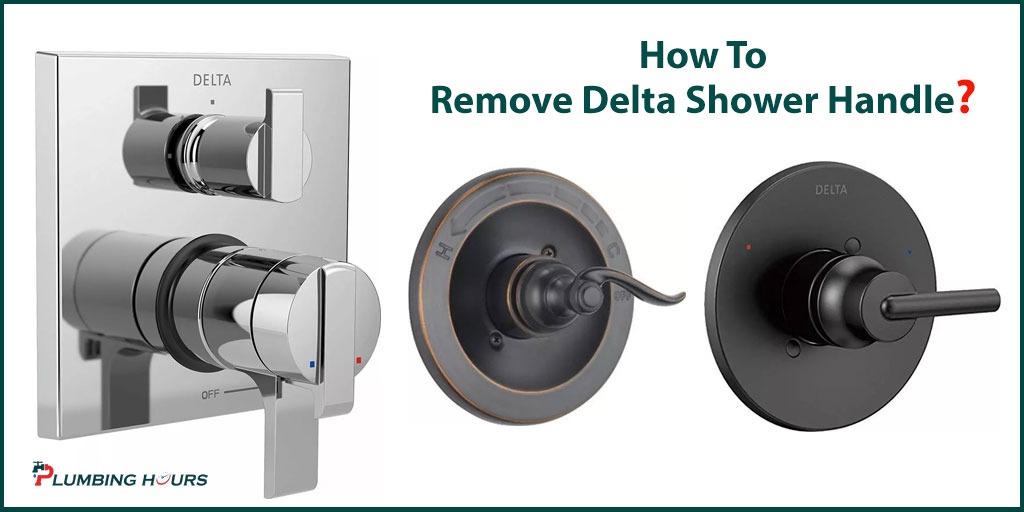
A good shower is as important as a good cup of coffee to get your day going. But, how terrible would it feel if you find out that your shower handle is refusing to budge despite the best of your efforts? If your bathroom happens to have a Delta shower faucet, then you have come to the right place to learn how to remove Delta shower handle.
The Delta Faucet Company has been a leading name in the bathroom fittings market for more than half a century. Despite the remarkable quality of Delta products, you’ll run into some maintenance issues at some point. In this article, we will thoroughly discuss Delta monitor shower handle removal, replacement, and repair.
5 Tips To Remove Delta Shower Handle
1. Handle Screws That Hide Beneath The Faceplate
For talking through how to remove Delta shower handle, we must consider a host of situations. The screws that attach the handle to the wall sometimes sit behind the faceplate. If that’s the case, you won’t see the handle screws at first glance. You need to undo the faceplate first. The handle stays attached to the faceplate as you take it out of the wall. Look at the faceplate’s backside and find the screws that connect the handle to it. Unscrew them, and the handle comes out. This Delta shower faucet handle removal process might come across as a bit tricky, but in reality, it won’t be much of a hassle. You can get it done within minutes.
2. Handles With Visible Screws
In some Delta shower handles, the screws are visible on the surface instead of being hidden underneath the faceplate. As you can imagine, this design attribute makes it much easier to remove. Remove the bonnet, handle, as well as sleeve from the valve stem by unscrewing the handle screw. Afterward, take off the pair of screws that locks the handle to the faceplate. Disconnect the faceplate and escutcheon after that. For removing Delta shower handle, you might have to use a flathead screwdriver to draw the pinout of the adapter. In doing so, you can unfasten the adapter from the valve and free the handle.
3. Handles With Plug Buttons
How to remove a Delta shower faucet handle that is secured by plug buttons? First, pull out the button plug from the outer side of the valve stem with the help of a flathead screwdriver. Then, unfasten the screw to separate the adapter and the handle from the valve stem. In some cases, you would have to turn the cover anticlockwise.
After that, proceed to loosen the two screws that keep the faceplate attached to the bathroom wall. Another possible scenario would require you to use the flathead screwdriver again to undo the adapter pin. Take off the screws so that the valve releases the adapter. Choose whichever method is applicable for you.
4. Setscrew Handles
Up until now, we have only shown you how to remove Delta shower handle with no set screw. In this section, we will expand our talking point to cover delta handles that come with setscrew designs. Your first course of action would be to remove the handle and adapter from the valve by loosening the set screw. Undoing the set screw would also allow you to drag out the sleeve from the valve. Next, extract the faceplate by unscrewing the pair of supporting screws. Like the handle types we previously discussed, you would have to occasionally use a flathead screwdriver to detach the adapter pin. Thereby, you can take away the adapter from the valve.
5. Handles With Threaded Bonnets
Grip the handle steadily and move the bonnet anticlockwise. The handle and bonnet will come apart from the valve. Loosen the pivot ring if there is any. Uninstall the faceplate next. Unscrew the screws with a flathead screwdriver and grab the retainer. If you don’t see any screws try rotating the entire retainer counterclockwise. It should come off.
Other Helpful Tips
- Instead of washing down the drain, put a bucket underneath the faucet so that the screws fall in it while removing the handle.
- Turn off the water supply before removing the setscrew Delta faucet handle or any other types of Delta shower handles.
How To Remove A Stuck Delta Shower Faucet Handle?
Your Delta shower handle won’t come off? Don’t worry! It’s a pretty common situation. If the faucet is old and rusty, it would be more difficult to remove. In this part of our article, we will shed light on how to remove Delta shower handle that has remained unaffected by your primary attempts.
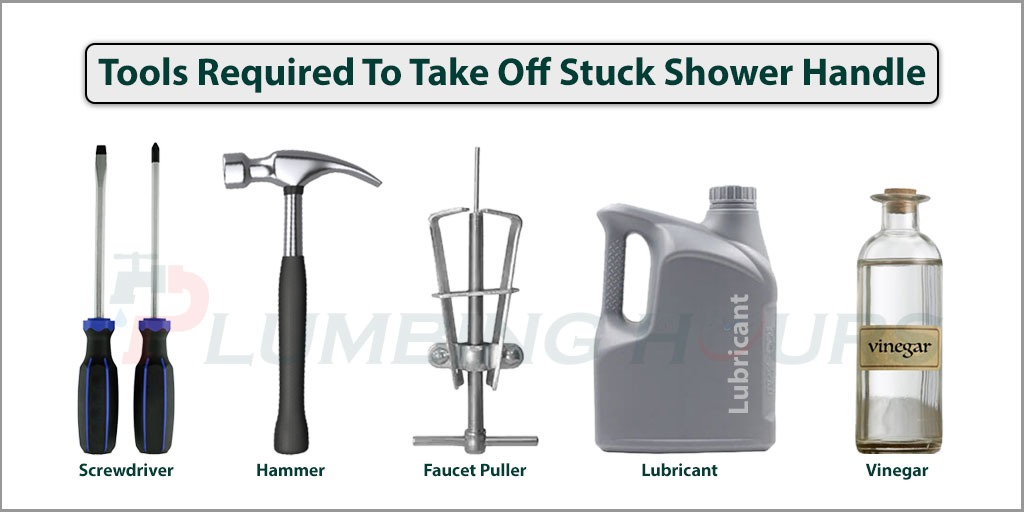
Tools Required To Take Off Stuck Shower Handle

1. Screwdriver
To remove Delta shower faucet handle, you would need two kinds of screwdrivers-a slot one and a flathead one. Having both at your disposal prepares you for all sorts of screws that you will stumble upon in a shower handle. A screw holder would be a much welcome bonus feature for the screwdriver you choose.
2. Hammer
A hammer would come in handy to get the handle out of the valve. That said, you don’t have to look for something overly powerful to serve this purpose. A classic mid-range hammer that you can find in almost any toolbox should work. Make sure it’s comfy to handle.
3. Lubricant
As we have mentioned earlier, corroded faucets could prove to be quite burdensome to pull out. A lubricant can make the process much simpler. We recommend using lubricant sprays, which are easier to apply. Lubricant eradicates rust and loosens the screws.
4. Faucet Puller (If Required)
We suggest the faucet puller as the last resort because it’s a tool that won’t be of much use to you in other plumbing situations. Generally, you would be able to take off a shower handle without a specialized tool. In most extreme scenarios, a faucet puller can forcibly extract the handle.
5. Plastic Bag and Vinegar
Everyday household items like plastic bags and vinegar can help you remove Delta shower handles. How to remove Delta shower handle knob using plastic bag and vinegar, you ask? We will spill the secret in the subsequent paragraphs. So, keep on reading.
5 Steps To Remove Stuck Shower Handle Screw
Step 1: Find Out Where The Screws Are
Closely inspect the faucet handle to determine where the screws are. If you can’t find any, look for a valve with the brand logo. The screws should be on the backside of the valve. Raise the valve and use a Phillip’s screwdriver, aka a flathead screwdriver, to pinpoint the screw locations.
Step 2: Use Lubricant If Required
Try to remove the screws with your screwdriver. If you face too much resistance, consider spraying some lubricant over the screws. The lubricant spray should penetrate the layer of rust and dust. Therefore, the screws would get to move more fluidly.
Step 3: Gently Tap With A Hammer
After applying lubricant, it should be quite easy to take off the handle. If the resilience persists, however, try lightly tapping on the handle with a hammer. Cover the shaft with a cloth to dampen the hammer’s blow and keep the handle from sustaining permanent damage.
Step 4: Using A Handle Puller
Ideally, the handle should be already removed. Coming to step four means you have exhausted all other options but the handle puller. Purchase a handle puller and attentively read the accompanying user manual. This is a guaranteed way to remove a stuck shower handle.
Step 5: Cover A Bag of Vinegar Around The Handle
Take a plastic bag and pour vinegar into it. Then tie it with the handle and leave it for six/seven hours. The vinegar proactively reacts with the sediment buildup and rust. As a result, the handle becomes easy to maneuver.
How To Remove The Delta Monitor Shower Handle?
Step 1: Prepare Your Tools
Assemble the tools you would need to remove the Delta shower handle. Here’s a list of the essentials:
1. Allen Wrench
An appropriately-sized Allen Wrench is mandatory to remove Delta Monitor shower handle. It detaches the set screw lever handle you would find in such Delta shower faucets.
2. Putty
If you accidentally damage the faucet, you can stop the leak using putty. You would also need it while installing a new O-ring.
3. Faucet Replacement Kit
A faucet replacement kit will give you access to all the necessary tools you would require while detaching and attaching a faucet.
4. Channel-lock Pliers
Channel-lock pliers allow you to access tricky spots because of their unique angular head design. You would find this piece of equipment very helpful during multiple faucet replacement stages.
Step 2: Turn Off The Water Supply
Turn off the main water supply to your house before removing the shower handle. If you forget to do so, your bathroom will get flooded.
Step 3: Remove Set Screw Lever Handle
Deploy the Allen Wrench to get the set screw lever handle out of your way. Take off the cap at the bottom of the shaft. Following that, turn your attention to the temperature regulation handle. Remove it as well. Carefully take out the screws afterward.
Step 4: Pull Down Orderly Covering, O-Ring, and Bonnet
Removing the bonnet might prove challenging because of the mineral deposit and rust. The channel-lock pliers effortlessly drag out the bonnet as it allows you to enforce a solid bite. Keep in mind, the stop plug should always remain in the exact location.
Step 5: Remove The Cartridge
Pull the cartridge away from the faucet head. If the cartridge gets jammed, utilize the channel-lock pliers to grab the cartridge and exert a greater pulling force.
Step 6: Install New O-Rings
Put putty on the new O-rings and fit them in the backside of the new cartridge. Insert the cartridge on the faucet head and provide sufficient pressure to fit it in.
Step 7: Reassemble The Faucet
To put the faucet back together, assemble the parts that you had previously taken apart. The parts that were removed last would go first in the reconstruction. So, the orderly coverings go in first, followed by the bonnet, the temperature control knob, and the handle. After you have re-organized all components, secure them by tightening the screws.
Related post for you:
How To Remove A Delta Kitchen Faucet?
How to Remove a Faucet Aerator Without a Wrench?
Best Touchless Bathroom Faucet with Temperature Control
Final Say
Hopefully, this was a fun and easy read to learn how to remove Delta shower handle. Upon following this guideline, you can master Delta shower faucet handle replacement in no time. So, the next time your Delta shower handle acts up, try to take care of the problem yourself before picking up the phone to call a plumber.

I have some info i would like to share to the readers here
Thanks for taking the time to write this post. im in the same business as well
I love the article i learned alot from this keep up the good work!
I just could not depart your site prior to suggesting that I actually enjoyed the standard info a person provide for your visitors? Is going to be back often in order to check up on new posts
In line with my observation, after a foreclosures home is offered at an auction, it is common to the borrower to be able to still have some sort ofthat remaining unpaid debt on the loan. There are many creditors who try to have all service fees and liens paid back by the future buyer. On the other hand, depending on specified programs, regulations, and state legislation there may be some loans that are not easily fixed through the transfer of financial loans. Therefore, the duty still remains on the client that has got his or her property foreclosed on. Thanks for sharing your notions on this web site.